Apr 18, 2012

20120411 International Volunteers training -- in Aletheia Unversity


It's my honor to have a chance for training International Volunteers with clonezilla and some portable applications in Aletheia University ( http://en.wikipedia.org/wiki/Aletheia_University ).

I must thank Professor Tzong-Heng Chi ( 紀宗衡 ) invite me to have a talk there.  I feel very excited if I have chance to share freeware in Mongolia.

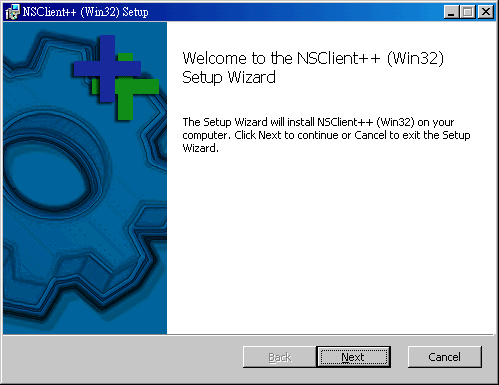
This training is for Clonezilla Live - A small bootable GNU/Linux distribution for imaging and cloning ( http://clonezilla.org ) and portable applications in Windows


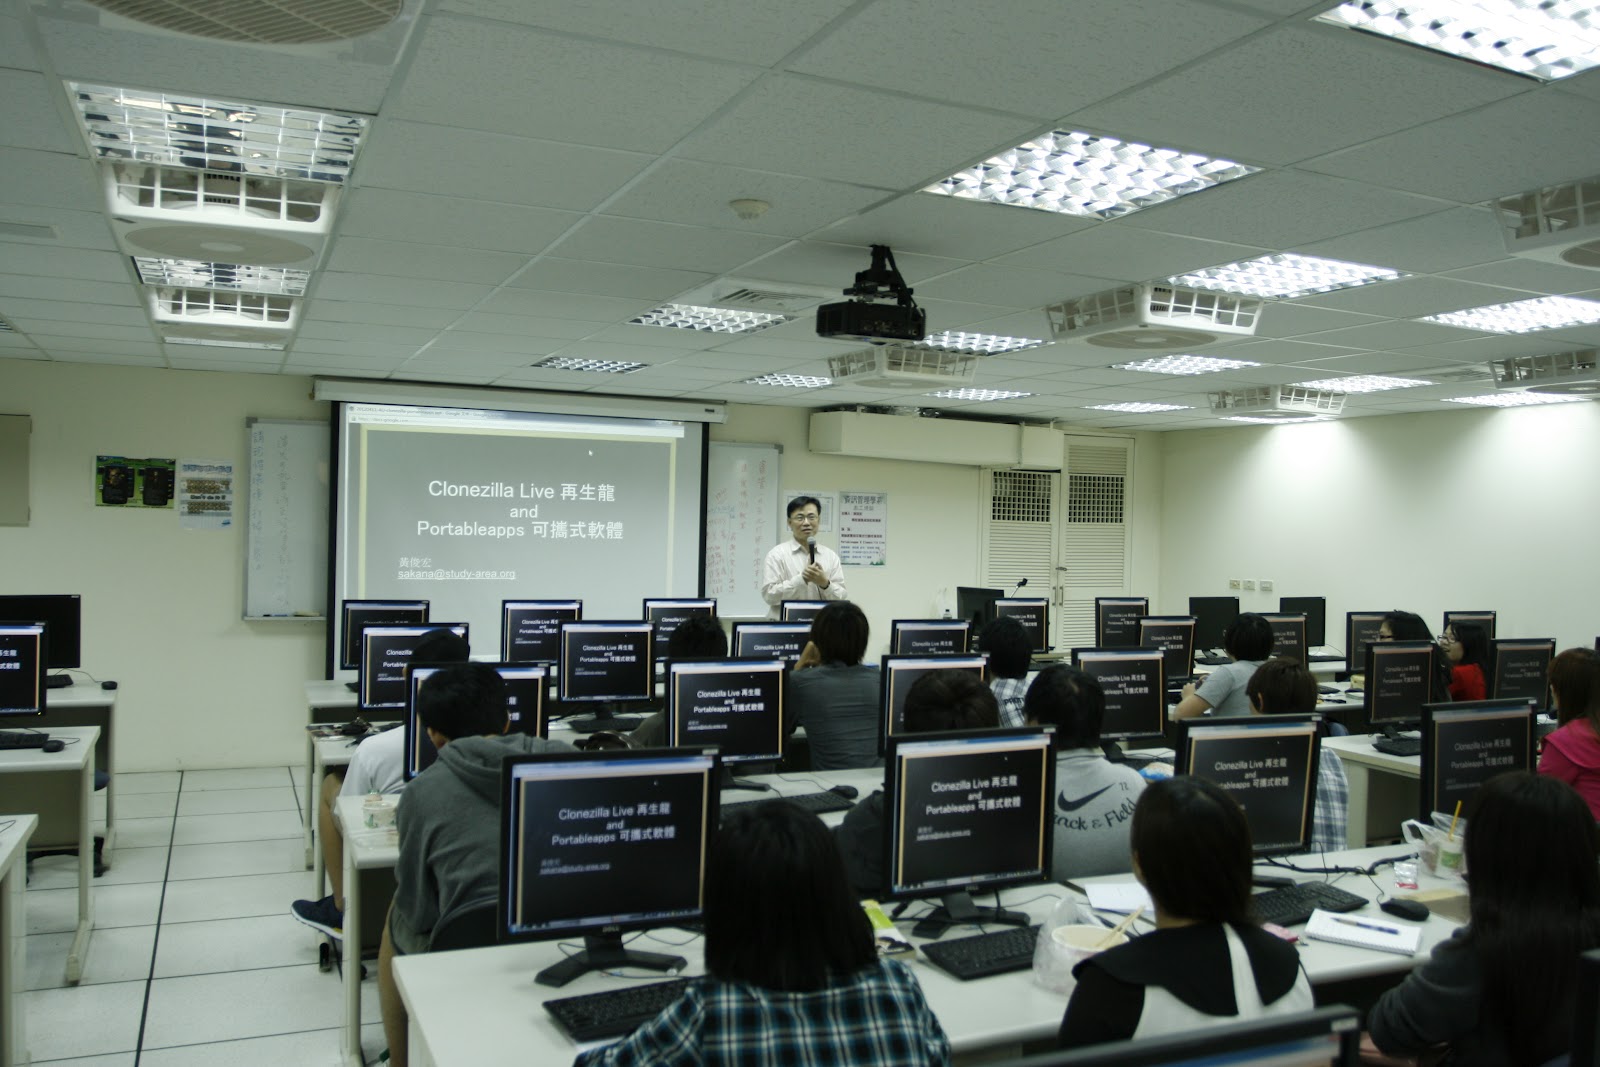
Volunteers build their own custom portable app suite with their interests.  And introduce their custom app suite to everyone in workshop.

Introduce  VLC Media Player portable (Streaming and Online Edit ) now ^^

We must thank GNOME and openSUSE -- They support us promote DVDs to students.
In this training we also introduce  GNOME Outreach Program for Women ( http://live.gnome.org/GnomeWomen/OutreachProgram2012 ) and Google Summer of Code ( http://code.google.com/soc/ ).

GNOME 3 Live DVD with openSUSE 


I must thank our Photographer ^^( The girl with black coat)


And thanks Aletheia University again ^^


Apr 12, 2012

Ezgo 10 Meeting in Mozilla Taiwan


Ezgo 10 Meeting in Mozilla Taiwan

Ezgo Official Site:
http://ezgo.westart.tw/ ( With Chinese )

Ezgo Introduction ( Reference  Debian wiki page http://wiki.debian.org/DebianEzGo )


The EzGo is a LiveCD created by OSS Application Consulting Centre (OSSACC) which is a Ministry of Education Taiwan funded project, and its executive the Software Liberty Association of Taiwan (SLAT).

It is a set of free software collection aims to promote the usage of free software on teaching and self-learning. It includes open tools and open content for both Linux and Windows systems.


EzGo's target are new and first time linux users. Which is making a user interface and art work on top of a distribution of Linux which is easy, especially for the new user.

Key design aims are:

Ease of installation and setup. The system pre-installed with all applications that users may needed, rather than needing additional installation and extensive configurations.
Features which will be familiar and easy to use for users familiar with other operating systems (except where there is a compelling reason to do things differently).


Our Ezgo 10 first meeting  in ozilla Taiwan Office.
We must thank Bobchao ( Community Manager at Mozilla Corporation )


The meeting start with  Eric Sun, thanks Mozilla Taiwan and all members from Ezgo.


Bob introduce Mozillians https://mozillians.org and BrowserID concept to us.


On the other way Bob also share his experience with P2PU  http://p2pu.org/en/ , give  Ezgo community some brainshare. ^_^

The fist task for Ezgo 10 Meeting is "Check task list".


And discuss with Block on Desktop.


For me, it's a very interesting meeting cause the difference with GNOME and KDE. (Ezgo 10 will try to use KDE Desktop this time ).  We discuss lots of design for desktop view.

Anyway, I know more about KDE Desktop.
Thanks
Alvin Su (蘇仕文) - KDE, Taiwan.  An elementary school teacher and Way (徐志緯)


There are some picture here, and thanks again for Mozilla Taiwan and Ezgo Members.


~enjoy it


Apr 8, 2012

Nagios with openSUSE 12.1


Nagios - A powerful monitoring system

Nagios is  powerful monitor system.

Nagios monitors your entire IT infrastructure to ensure systems, applications, services, and business processes are functioning properly. In the event of a failure, Nagios can alert technical staff of the problem, allowing them to begin remediation processes before outages affect business processes, end-users, or customers. ( Reference from official website)

Official websitehttp://www.nagios.org/

openSUSE is a free and Linux-based operating system for your PC, Laptop or Server. You can surf the web, manage your e-mails and photos, do office work, play videos or music and have a lot of fun!


Users could find the packages which they want to install in  http://software.opensuse.org/search
And they could use one-click Install the packages fast and easier.
With One-click install, you could install the packages and add the repository(you will receive the notify when the repository update their software).


Otherwise http://software.opensuse.org/search also provide other Linux packages like Fedora, Debian, Ubuntu, CentOS, RHEL, SLES. ( Because we have openSUSE Build Service)


The Lab environment

Server
OS: openSUSE 12.1
IP: 192.168.3.128 (Please ajust it for your IP)

Linux Client: 192.168.3.130 (
Please ajust it for your IP)
Windows Client: 192.168.3.129 (
Please ajust it for your IP)


Part I: Setup Nagios Server

Server:
1. Install Nagios packages
You could use one-click install in server side

Nagios
http://software.opensuse.org/ymp/openSUSE:12.1/standard/nagios.ymp

Nagios Plugins
http://software.opensuse.org/ymp/openSUSE:12.1/standard/nagios-plugins.ymp


Nagios Addons Extras
http://software.opensuse.org/ymp/openSUSE:12.1/standard/nagios-plugins-extras.ymp


Of course you could use command like zypper 

# zypper   install   nagios   nagios-plugins   nagios-plugins-extras

2. Creat nagiosadmin password


If this is your first time to create nagios user password, please add -c option
Don't add -c if add the other one ( It will overwirte all password)


Please do it on server
#htpasswd2   -c   /etc/nagios/htpasswd.users   nagiosadmin
Input your password
Input again

3. You could add another user if necessary
Please do it on server
#htpasswd2   /etc/nagios/htpasswd.users   nagiosuser
Input your password
Input again

Notes: nagiosadmin is the administraotr, you could find the configuration in /etc/nagios/cgi.cfg. So if you don't want to use this user name for administrator, you could re-edit the /etc/nagios/cgi.cfg.


4.Set up default enable nagios
#chkconfig  nagios  --list
#chkconfig  nagios  on
#chkconfig  nagios  --list

5.Restart apache2 service and set up default enable
#rcapache2  restart
#chkconfig   apache2   --list
#chkconfig   apache2   on
#chkconfig   apache2   --list

6.Start Nagios service
#rcnagios   start

7. Test Nagios
Open your browser, input http://127.0.0.1/nagios/
in URL
You could use your private or public IP to connect too.

It will ask username and password.
Please input
Username nagiosadmin
password the password you set up


You will see Nagios webpage


Like This


You could see some service status.

And you will notice HTTP Service is warning.
Because there is no default webpage here.
You could create one to resolve these problem.


#vi   /srv/www/htdocs/index.html
add It works !


The host and service configuration is setting in /etc/nagios/nagios.cfg
Nagios Server local monitoring is also setting in /etc/nagios/nagios.cfg
# Definitions for monitoring the local (Linux) host
cfg_file=/etc/nagios/objects/localhost.cfg

You also could use cfg_dir to import host and service configuration if you have many hosts(setting in /etc/nagios/nagios.cfg)
# You can also tell Nagios to process all config files (with a .cfg
# extension) in a particular directory by using the cfg_dir
# directive as shown below:

#cfg_dir=/etc/nagios/servers


So we know that all host we want to monitor -- you must configuration file in /etc/nagios/objects directory, and You must setting up /etc/nagios/nagios.cfg with cfg_file=xxxx.cfg


If you want to check the configuration syntax
You could use#nagios  -v   /etc/nagios/nagios.cfg

You could find more document here


http://wiki.nagios.org/index.php/Main_Page


** modify notification  e-mail **
# vi   /etc/nagios/objects/contacts.cfg
re-edit your  e-mail for notify
define contact{
       contact_name    nagiosadmi    ; Short name of user
       use    generic-contact         ; Inherit default values from generic-contact template (defined above)
       alias       Nagios Admin            ; Full name of user
       email  youraccount@yourdomain ; <<***** CHANGE THIS TO YOUR EMAIL ADDRESS ******
       }

Please check your mail service status

You could use 
#rcpostfix  status 

Double check Nagios configuration
#nagios  -v   /etc/nagios/nagios.cfg

Restart Nagios
#rcnagios   restart

** Nagios Server setting up finish**


Part II: Nagios Client -- Linux Server client

1. Install nagios-nrpe packages

You could use YaST software management module ( For GUI)

#yast2  sw_single

You could search nrpe, and you will see
nagios-nrpe
nagios-plugins-nrpe

You could select the check out box and install them.

Or you could use command line to install it
Like ( #yast  -i  nagios-nrpe  nagios-plugins-nrpe)

2. Set up nagios-nrpe


(Double check /etc/services for ports with nrpe -- 5666/tcp # nagios nrpe )
#grep  5666  /etc/services

Modify the configuration -- allow  Nagios server connect
# vi  /etc/nagios/nrpe.cfg

allowed_hosts=127.0.0.1,192.168.3.128

Notice: You must use comma (",") after 127.0.0.1

You can not use space after 127.0.0.1If you use space after 127.0.0.1 you will have Create SSL HandShake error

Start nrpe
#rcnrpe   start


4.Test nagios-nrpe

In Client side


Execute check_nrpe , You will see NRPE version
# /usr/lib/nagios/plugins/check_nrpe   -H   localhost
NRPE v2.12

*************************************************************
In Server side


Install nagios-nrpe packages
#yast  -i  nagios-nrpe  nagios-plugins-nrpe

Test nagios client
#/usr/lib/nagios/plugins/check_nrpe  -H  192.168.3.130
NRPE v2.12

(Please check your firewall disable or open port for nagios-nrpe, You could use #yast2  firewall to view it)


*************************************************************


Test some information with host


In Client side:


View online users#/usr/lib/nagios/plugins/check_nrpe -H localhost -c check_users

Average loading#/usr/lib/nagios/plugins/check_nrpe -H localhost -c check_load

Total process
#/usr/lib/nagios/plugins/check_nrpe -H localhost -c check_total_procs

Zombie Process
#/usr/lib/nagios/plugins/check_nrpe -H localhost -c check_zombie_procs

Disk space usages#/usr/lib/nagios/plugins/check_nrpe -H localhost -c check_hda1


(Default command[check_hda1]=/usr/lib/nagios/plugins/check_disk -w 20% -c 10% -p /dev/hda1
After Kernel 2.6.20, we use sda for IDE | SATA | SSD harddisk, so we must modify it to /dev/sda1)
You could modify command define in 
/etc/nagios/nrpe.cfg
(copy  hda1 to your real  Partition)

#vi   /etc/nagios/nrpe.cfg
#command[check_hda1]=/usr/lib/nagios/plugins/check_disk -w 20% -c 10% -p /dev/hda1
command[check_sda1]=/usr/lib/nagios/plugins/check_disk -w 20% -c 10% -p /dev/sda1
command[check_sda2]=/usr/lib/nagios/plugins/check_disk -w 20% -c 10% -p /dev/sda2
command[check_ssh]=/usr/lib/nagios/plugins/check_ssh   localhost
command[check_smtp]=/usr/lib/nagios/plugins/check_smtp  localhost


(If you want to do it quickly and you are lazy to modify -- If your Lab IP is the same with me. You could download the configuration I modify  

#wget   http://dl.dropbox.com/u/12787647/client-nrpe.cfg
(If your IP is not the same with me, just fix allowed_hosts= )


Overwrite the original file
#mv   client-nrpe.cfg   /etc/nagios/nrpe.cfg
)


Restart  nrpe service
#rcnrpe  restart

Test again# /usr/lib/nagios/plugins/check_nrpe -H localhost -c check_sda1
# /usr/lib/nagios/plugins/check_nrpe -H localhost -c check_sda2


Please do that at Server Side
#/usr/lib/nagios/plugins/check_nrpe  -H  192.168.3.130   -c  check_sda1
#/usr/lib/nagios/plugins/check_nrpe  -H  192.168.3.130   -c  check_sda2


Part III: Add Linux Nagios Client to Nagios server

*************************************************************


Lab: Create template for host
New Windows workstation template --  windows-pc 
New host group template for windows work station -- windows-pcgroup
New host group template for linux server --  linux-servergroup
New service template for work station -- generic-pc-service


In Server side

We could use keyword "use" to inherit template in nagios configuration.


If you want to monitor your workstation, they will turn off at night.
So you must create the template for  windows-pc fits the workhour.

Nagios template configuration file  /etc/nagios/objects/templates.cfg
Nagios time periods template configuration file is   /etc/nagios/objects/timeperiods.cfg

Re-edit  Nagios template, Copy windows-servers section, use it for  windows-pc and modify it to  workhours

#vi   /etc/nagios/objects/templates.cfg

add new host define for  windows-pc
# Windows host definition template - This is NOT a real host, just a template!

define host{
       name                    windows-pc      ; The name of this host template 
       use                     generic-host    ; Inherit default values from the generic-host template
       check_period      workhours    ; Time Periods
       check_interval          5               ; Actively check the server every 5 minutes
       retry_interval          1               ; Schedule host check retries at 1 minute intervals
       max_check_attempts      10              ; Check each server 10 times (max)
       check_command           check-host-alive; Default command to check if servers are "alive"
       notification_period     workhours            ; Send notification out at any time - day or night
       notification_interval   30              ; Resend notifications every 30 minutes
       notification_options    d,r             ; Only send notifications for specific host states
       contact_groups          admins          ; Notifications get sent to the admins by default
       hostgroups           windows-pcgroup    ; default hostgroup
       register                0               ; DONT REGISTER THIS - ITS JUST A TEMPLATE
       }

Add a hostgroup for  windows-pcgroup
You could add

# Define host group for Windows PC
define hostgroup{
    hostgroup_name  windows-pcgroup    ; The name of the hostgroup
    alias        Windows PC Group   ; Long name of the group
    }


Add a hostgroup for linux-servergroup You could add
# Define host group for Linux Servers
define hostgroup{
       hostgroup_name  linux-servergroup      ; The name of the hostgroup
       alias           Linux Server Group      ; Long name of the group
       }
Add a hostgroup for windows-server 
(Default define in /etc/nagios/objects/windows.cfg)
You could add# Define a hostgroup for Windows machines
# All hosts that use the windows-server template will automatically be a member of this group

define hostgroup{
       hostgroup_name  windows-servers ; The name of the hostgroup
       alias           Windows Servers ; Long name of the group
       }


modify linux-server template -- define hostgroup for linux-servergroup


# Linux host definition template - This is NOT a real host, just a template!

define host{
       name                            linux-server    ; The name of this host template
       use                             generic-host    ; This template inherits other values from the generic-host template
       check_period                    24x7            ; By default, Linux hosts are checked round the clock
       check_interval                  5               ; Actively check the host every 5 minutes
       retry_interval                  1               ; Schedule host check retries at 1 minute intervals
       max_check_attempts              10              ; Check each Linux host 10 times (max)
       check_command                   check-host-alive ; Default command to check Linux hosts
       notification_period             workhours       ; Linux admins hate to be woken up, so we only notify during the day
                                                       ; Note that the notification_period variable is being overridden from
                                                       ; the value that is inherited from the generic-host template!
       notification_interval           120             ; Resend notifications every 2 hours
       notification_options            d,u,r           ; Only send notifications for specific host states
       contact_groups                  admins          ; Notifications get sent to the admins by default
       hostgroups                      linux-servergroup ; Host groups that Linux servers should be a member of
       register                        0               ; DONT REGISTER THIS DEFINITION - ITS NOT A REAL HOST, JUST A TEMPLATE!
       }


Add a new service template for workstation --  generic-pc-service
You could add# Generic PC service definition template - This is NOT a real service, just a template!

define service{
       name                            generic-pc-service      ; The 'name' of this service template
       active_checks_enabled           1                       ; Active service checks are enabled
       passive_checks_enabled          1                       ; Passive service checks are enabled/accepted
       parallelize_check               1                       ; Active service checks should be parallelized (disabling this can lead to major performance problems)
       obsess_over_service             1                       ; We should obsess over this service (if necessary)
       check_freshness                 0                       ; Default is to NOT check service 'freshness'
       notifications_enabled           1                       ; Service notifications are enabled
       event_handler_enabled           1                       ; Service event handler is enabled
       flap_detection_enabled          1                       ; Flap detection is enabled
       failure_prediction_enabled      1                       ; Failure prediction is enabled
       process_perf_data               1                       ; Process performance data
       retain_status_information       1                       ; Retain status information across program restarts
       retain_nonstatus_information    1                       ; Retain non-status information across program restarts
       is_volatile                     0                       ; The service is not volatile
       check_period                    workhours               ; The service can be checked at any time of the day
       max_check_attempts              3                       ; Re-check the service up to 3 times in order to determine its final (hard) state
       normal_check_interval           10                      ; Check the service every 10 minutes under normal conditions
       retry_check_interval            2                       ; Re-check the service every two minutes until a hard state can be determined
       contact_groups                  admins                  ; Notifications get sent out to everyone in the 'admins' group
       notification_options            w,u,c,r                 ; Send notifications about warning, unknown, critical, and recovery events
       notification_interval           60                      ; Re-notify about service problems every hour
       notification_period             workhours               ; Notifications can be sent out at any time
        register                        0                      ; DONT REGISTER THIS DEFINITION - ITS NOT A REAL SERVICE, JUST A TEMPLATE!
       }


workhours is  9:00 - 17:00

You could reference  /etc/nagios/objects/timeperiods.cfg

# 'workhours' timeperiod definition
define timeperiod{
       timeperiod_name workhours
       alias           Normal Work Hours
       monday          09:00-17:00
       tuesday         09:00-17:00
       wednesday       09:00-17:00
       thursday        09:00-17:00
       friday          09:00-17:00
       }


(
If you want to do it quickly and you are lazy to modify. You could download the configuration I modify  
#wget   http://dl.dropbox.com/u/12787647/server-templates.cfg

Overwirte the original file
# mv  server-templates.cfg   /etc/nagios/objects/templates.cfg
)


In Server side


Copy windows configuration for linux server
# cp  /etc/nagios/objects/windows.cfg   /etc/nagios/objects/linux.cfg

Modify /etc/nagios/objects/linux.cfg -- Add hostname and Client IP

#vi   /etc/nagios/objects/linux.cfg
originaldefine host{
use windows-server ; Inherit default values from a template
host_name winserver ; The name we're giving to this host
alias My Windows Server ; A longer name associated with the host
address 192.168.1.2 ; IP address of the host
}

modify to (Linux client's hostname and IP)

define host{
use   linux-server ; you must reference template
host_name   suseserver130 ; The name we're giving to this host
alias openSUSE Server2 ; A longer name associated with the host
address 192.168.3.130 ; IP address of the host
}

change hostname for service
you could use :%s/winserver/suseserver130/gc 

to change define service{ } section 
from
host_name winserver
to host_name suseserver130

comment hostgroup (we already define it in template)
originaldefine hostgroup{
hostgroup_name windows-servers ; The name of the hostgroup
alias Windows Servers ; Long name of the group
}

modify to#define hostgroup{
#hostgroup_name windows-servers ; The name of the hostgroup
#alias Windows Servers ; Long name of the group
#}


Setting up service
Change define service{ } section

service_description amd check_command
(from check_nt to check_nrpe)


original
define service{
use generic-service
host_name suseserver130
service_description NSClient++ Version
check_command check_nt!CLIENTVERSION
}

modify to (for example: check_users)


define service{
use generic-service
host_name suseserver130
service_description Online Users
check_command check_nrpe!check_users
}

define service{
       use                     generic-service
       host_name               suseserver130
       service_description     Check sda1
       check_command           check_nrpe!check_sda1
       }

define service{
       use                     generic-service
       host_name               suseserver130
       service_description     Check sda2
       check_command           check_nrpe!check_sda2
       }

define service{
       use                     generic-service
       host_name               suseserver130
       service_description     Check Load
       check_command           check_nrpe!check_load
       }

define service{
       use                     generic-service
       host_name               suseserver130
       service_description     Total_Procs
       check_command           check_nrpe!check_total_procs
       }

define service{
       use                     generic-service
       host_name               suseserver130
       service_description     Check SSH
       check_command           check_nrpe!check_ssh
       }

define service{
       use                     generic-service
       host_name               suseserver130
       service_description     Check SMTP
       check_command           check_nrpe!check_smtp
       }


Notice: the host_name must the same with the hostname in define host { } section


(
If you want to do it quickly and you are lazy to modify -- If your Lab IP is the same with me. You could download the configuration I modify  
#wget   http://dl.dropbox.com/u/12787647/server-linux.cfg
(If you IP is not the same with me just change your Client IP address)

Overwrite original file
# mv  server-linux.cfg   /etc/nagios/objects/linux.cfg
)


Double check

Server: setting up who should be monitor
  • /etc/nagios/object/linux.cfg

Client: setting up who could check it, and define command.
  • /etc/nagios/nrpe.cfg


**Setting up NRPE command**
In Server side:

add check_nrpe command in /etc/nagios/objects/commands.cfg

# vi   /etc/nagios/objects/commands.cfg
add# 'check_nrpe' command definition
define command{
command_name check_nrpe
command_line $USER1$/check_nrpe -H $HOSTADDRESS$ -c $ARG1$
}

(If you want to do it quickly and you are lazy to modify. You could download the configuration I modify
#wget   http://dl.dropbox.com/u/12787647/server-commands.cfg

Overwrite the original file
# mv   server-commands.cfg   /etc/nagios/objects/commands.cfg
)


**設定 Nagios 載入 linux.cfg **

In Serverside:

Copy  linux.cfg for one of  linux server  
# cp  /etc/nagios/objects/linux.cfg   /etc/nagios/objects/linux130.cfg

Modify /etc/nagios/nagios.cfg and setting up nagios Clinet configuration.

#vi   /etc/nagios/nagios.cfg
add #Definitions for monitoring the Linux server
cfg_file=/etc/nagios/objects/linux130.cfg

Double check configuration
# nagios   -v   /etc/nagios/nagios.cfg

Restart nagios
#rcnagios   restart

(Notes: It will be check after few mins)


Part IV: Nagios Client-- Windows Server / Windows PC

1. Install NSClient++
Please do it at Windows

Open your browser and connect to NSClient++ project website to download it
http://sourceforge.net/projects/nscplus/

For example NSClient 0.3.8-Win32
http://downloads.sourceforge.net/project/nscplus/nscplus/NSClient%2B%2B%200.3.8/NSClient%2B%2B-0.3.8-Win32.msi?use_mirror=ncu&ts=1280992189&r=http://sourceforge.net/projects/nscplus/files/

In wizardPlease click Next


End-User License Agreement
select ' I accept the terms in the License Agreement' → Next

Custom Setup
Please click Next


NSClient will detect old configuration
Please click Next


This is the most important
Allow hosts: Please input Nagios Server IP (Only allow this host to connect)
select the modules you want to load Next


Start to install
Click Install


select Start service → Finish


Part V: add Windows server /PC (Nagios Client) to Nagios server

In Server side

Copy windows.cfg  to Windows server or workstation

# cp  /etc/nagios/objects/windows.cfg   /etc/nagios/objects/windows129.cfg

re-edit the configuration
# vi   /etc/nagios/objects/windows129.cfg

Step1:
Modify host_name winserver to Windows workstation hostname
for example winpc129

  • you could use vi :%s/winserver/winpc129/gc

Step 2:
re-edit Default IP to   Client IP address

Change template setting
fromdefine host{
use windows-server ;
host_name winserver ; The name we're giving to this host
alias My Windows Server ; A longer name associated with the host
address 192.168.1.2 ; IP address of the host
}

todefine host{
use windows-pc ; Inherit default values from a template
host_name winpc129 ; The name we're giving to this host
alias Windows PC 192.168.3.129 ; A longer name associated with the host
address 192.168.3.129 ; IP address of the host
}

check all of host_name in define service section must winpc129 (your client hostname), And inherit generic-pc-service to check and notify in workhours.

define service{
use generic-pc-service
host_name winpc129
service_description NSClient++ Version
check_command check_nt!CLIENTVERSION
}

Disable W3SVC( work station does not enable IIS)

#define service{
#        use                     generic-pc-service
#        host_name               winpc129
#        service_description     W3SVC
#        check_command           check_nt!SERVICESTATE!-d SHOWALL -l W3SVC
#        }


Comment the hostguoup setting (we already setting it in template)
fromdefine hostgroup{
hostgroup_name windows-servers ; The name of the hostgroup
alias Windows Servers ; Long name of the group
}

to
#define hostgroup{
# hostgroup_name windows-servers ; The name of the hostgroup
# alias Windows Servers ; Long name of the group
# }

((If you want to do it quickly and you are lazy to modify -- If your Lab IP is the same with me. You could download the configuration I modify  
#wget   http://dl.dropbox.com/u/12787647/server-windows.cfg
#wget   http://dl.dropbox.com/u/12787647/server-windows129.cfg
(If you IP is not the same with me just change your Client IP address)


Overwrite original file
# mv  server-windows.cfg   /etc/nagios/objects/windows.cfg
# mv  server-windows129.cfg   /etc/nagios/objects/windows129.cfg
)


modify /etc/nagios/nagios.cfg
add windows129.cfg

#vi   /etc/nagios/nagios.cfg
add cfg_file=/etc/nagios/objects/windows129.cfg

Double check the configuration# nagios  -v  /etc/nagios/nagios.cfg

Restart nagios
#rcnagios   restart

( Please confirm Windows firewall --  server could ping client and port 12489 is open )
( for win2008 -- File And Print Sharing (Echo Request - ICMPv4-IN) )

You could check in Server side
# /usr/lib/nagios/plugins/check_nt  -H  192.168.3.129  -p  12489   -v  CLIENTVERSION
# /usr/lib/nagios/plugins/check_nt  -H  192.168.3.129  -p 12489  -v   USEDDISKSPACE  -l  c

Window Client 也可以重新啟動 nsclient++


It will display like


Optional Lab: Notify via Jabber (google talk)

Nagios use e-mail to notify people. If you want to notify you in real time, you could use jabber (google talk) to notify.

Reference http://blogs.gnome.org/woody/2012/02/18/nagios-xmpp-notifications-for-gtalk/
We use  One-Click Install  to install packages.

Install python-xmpppy
The command is in one line.#OneClickInstallCLI  http://software.opensuse.org/ymp/devel:languages:python/openSUSE_12.1/python-xmpppy.ymp

double check we install the packages
# zypper   search   xmpp

S | 名稱                      | 摘要                                                                | 類型    
--+---------------------------+---------------------------------------------------------------------+---------
 | libqxmpp-devel            | Qxmpp Development Files                                             | 套件    
 | libqxmpp1                 | Qt XMPP Library                                                     | 套件    
 | libqxmpp1-32bit           | Qt XMPP Library                                                     | 套件    
i | perl-Net-XMPP             | XMPP Perl Library                                                   | 套件    
 | python-pyxmpp             | Python Jabber/XMPP Implementation                                   | 套件    
 | python-pyxmpp             | Python Jabber/XMPP Implementation                                   | src 套件
 | python-pyxmpp-debuginfo   | Debug information for package python-pyxmpp                         | 套件    
 | python-pyxmpp-debugsource | Debug sources for package python-pyxmpp                             | 套件    
 | python-sleekxmpp          | Python XMPP (Jabber) Library that Implements Everything as a Plugin | 套件    
 | python-sleekxmpp          | Python XMPP (Jabber) Library that Implements Everything as a Plugin | src 套件
i | python-xmpppy             | Jabber Library for Python                                           | 套件    
 | python-xmpppy             | Jabber Library for Python                                           | src 套件
i | sendxmpp                  | A perl-script to send xmpp, similar to what mail does for mail      | 套件  


create the file "notify_via_jabber" and add the google account and password ( This google accont must be one of the contact with the google account who will be notify )

# vi   /usr/local/bin/notify-via-jabber
#!/usr/bin/python -tt

import warnings
warnings.simplefilter("ignore")

import xmpp
from xmpp.protocol import Message

from optparse import OptionParser
import ConfigParser
import sys
import os

parser = OptionParser()
opts, args = parser.parse_args()

if len(args) < 1:
   print "xmppsend message [to whom, multiple args]"
   sys.exit(1)

msg = args[0]

msg = msg.replace('\\n', '\n')

# Connect to the server
c  =  xmpp.Client('gmail.com')
c.connect( ( 'talk.google.com', 5223 ) )

# Authenticate to the server
jid  =  xmpp.protocol.JID( 'example@gmail.com' )
c.auth( jid.getNode( ), 'yourgmailpassword' )

if len(args) < 2:
   r = c.getRoster()
   for user in r.keys():
       if user == username:
           continue
       c.send(Message(user, '%s' % msg))
else:
   for user in args[1:]:
       c.send(Message(user, '%s' % msg))

(If you are lazy to vi..... you could download it
#wget    http://dl.dropbox.com/u/12787647/2012-3-31-nagios/notify-via-jabber
But don't forget to add your google account and password )
#chmod  a+x  notify-via-jabber
# mv   notify-via-jabber    /usr/local/bin/

Send test message
#/usr/local/bin/notify-via-jabber  "testmesg"  google_account_you_notify  


add the command to /etc/nagios/objects/commands.cfg

# vi   /etc/nagios/objects/commands.cfg
add the commanddefine command{
       command_name    host-notify-by-jabber
       command_line    /usr/local/bin/notify-via-jabber "Host '$HOSTALIAS$' is $HOSTSTATE$ - Info : $HOSTOUTPUT$" $CONTACTPAGER$
       }

define command{
       command_name    notify-by-jabber
       command_line    /usr/local/bin/notify-via-jabber  "$NOTIFICATIONTYPE$ $HOSTNAME$ $SERVICEDESC$ $SERVICESTATE$ $SERVICEOUTPUT$ $LONGDATETIME$" $CONTACTPAGER$
       }

You will see  $CONTACTPAGER$ send the message.

So we must add PAGER with our contact

# vi  /etc/nagios/objects/contacts.cfg
add pager(the account who send the message)
define contact{
       contact_name                    nagiosadmin             ; Short name of user
       use                             generic-contact         ; Inherit default values from generic-contact template (defined above)
       alias                           Nagios Admin            ; Full name of user
       email                           sakana@study-area.org   
       pager                          yourgoogle_accont
       }


Modify  /etc/nagios/objects/templetes.cfg

# vi /etc/nagios/objects/templates.cfg
re-edit generic-contact , add jabber

define contact{
       name                            generic-contact         ; The name of this contact template
       service_notification_period     24x7                    ; service notifications can be sent anytime
       host_notification_period        24x7                    ; host notifications can be sent anytime
       service_notification_options    w,u,c,r,f,s             ; send notifications for all service statesents
       host_notification_options       d,u,r,f,s               ; send notifications for all host states
       service_notification_commands   notify-service-by-email,notify-by-jabber ; 加入設定
       host_notification_commands      notify-host-by-email,host-notify-by-jabber    ; 加入設定
       register                        0                       ; DONT REGISTER THIS DEFINITION - ITS NOT A REAL CONTACT, JUST A TEMPLATE!
       }


Double check nagios configuration# nagios  -v  /etc/nagios/nagios.cfg

Restart nagios
#rcnagios   restart


~enjoy it